Showing posts with label Plushie. Show all posts
Friday, September 26, 2014
Amigurumi Serenity Pattern
My sister requested this for her unborn son. She and her husband like Firefly by Joss Whedon. She thought that it would be cool to let him have a crocheted Serenity. And I thought, why not let others be able to make one of their own. I don't know the exact measurements but it is under 12".
**Please don't make these to sell them. Also let others know where you got the pattern from. Thanks!
Serenity Spaceship Pattern
G Hook (4.25 mm)
MAR = Magic Adjustable Ring
ch = chain
sc = single crochet
st =stitch
sl st = slip stitch
sk st = skip stitch
inv dec = invisible decrease
inc = increase
*(...)* = repeat between * around
Rd = Round
*All worked in both loops.
Body:
MAR
Rd 1: 6 sc into MAR (6)
Rd 2: inc around (12)
Rd 3: sc around (12)
Rd 4: *sc, inc* (18)
Rd 5-6: sc around (18)
Rd 7: *sc 2 st, inc* (24)
Rd 8-9: sc around (24)
Rd 10: *sc 3 st, inc* (30)
Rd 11-13: sc around (30)
Rd 14: *sc 3 st, inv dec* (24)
Rd 15: sc around (24)
Rd 16: *sc 2 st, inv dec* (18)
Rd 17-18: sc around (18)
Rd 19: *sc 2 st, inc* (24)
Rd 20: *sc 3 st, inc* (30)
Rd 21-28: sc around (30)
Rd 29: *sc 3 st, inv dec* (24)
Rd 30: *sc 2 st, inv dec* (18)
Rd 31: sc around (18)
Rd 32: sc 9 st, sl st 9 st (18)
Rd 33-37: sc around (18)
Rd 38: *sc, inv dec* (12)
Rd 39-41: sc around (12)
Rd 42: sc st, inv dec 2 st, sc 4 st, inc 2 st, sc 3 st (16)
Rd 43: sc 2 st, inc 2 st, sl st 6 st, inc 2 st, sc 4 st (20)
Rd 44-46: sc around (20)
Rd 47: sc 4 st, inv dec, sc 7 st, inv dec, sc 5 st (18)
Rd 48: sc around (18)
Rd 49: sc 2 st, inv dec, sc 7 st, inv dec, sc 4 st (16)
Rd 50: sc 2 st, inv dec, sc 5 st, inv dec, sc 4 st (14)
Rd 51: sc 2 st, inv dec, sc 4 st, inv dec, sc 4 st (12)
Rd 52: inv dec around (6) END
Turbines:
*Make 2
MAR
Rd 1: 6 sc into MAR (6)
Rd 2: inc around (12)
Rd 3-11: sc around (12)
Rd 12: inv dec around (6) END
Wings:
*Make 2. Have a long tail before starting ch.
Rd 1: ch 14, sl st to 1st ch (14)
Rd 2-5: sc around (14)
Rd 6: *sc 5 st, inv dec* (12)
Rd 7-9: sc around (12) END *Don't close and leave a long tail. This end is sown to turbine.
APU:
*This is the small piece on the top of the back.
Row 1: ch 7, turn (7)
Row 2-5: sc 6 st, ch, turn (6)
Row 6: sk st, sc 4 st, ch, turn (4)
Row 7: sc 4 st, ch, turn (r) END *Leave long tail to sew. Fold in half and sew the piece on until about a third left. Fold in the two corners to middle and sew closed.
Wrap Around Piece:
MAR
Rd 1: 6 sc into MAR (6)
Rd 2-46: sc around (6) END *Leave long tail to sew.
Then use a yarn darner and black yarn to embroider as many details as you want. After this, you're done! Congrats! Now go aim to misbehave. ;)
Tuesday, September 9, 2014
Amigurumi Toothless
This was a fun pattern, and a little tricky. I wanted to crochet something but I wasn't in the mood of doing my own pattern for some reason. I was sniffing around Ravelry and seeing what I could make. Then I remembered that I had found one a while ago that I thought was pretty cool: Toothless. The pattern can be found here for free by Nicole's Nerdy Knots.
I may have only done this one in a day... and my thumb is paying for it. He doesn't look that big in the pictures but his wingspan is over 2 ft. There are also a lot of small rounds to make up things like his tail and the spikes. It hurt but you get used to it. I did change the pattern on the wings slightly. I thought that it would look more accurate to the movie, and I would have to do fewer stitches. Score on both counts! I like how it turned out.
Saturday, September 6, 2014
Recent Art
So I've been trying to keep myself busy while being at home. I decided to do some art. It helps keep me distracted, mostly. While I was with my parents at my Grandad's house, I found some artwork that Granni started before she died. I was able to finish the first two pictured there because there was still some paint and brushes at his house. And no one seemed to mind. I think others may have been excited to see them finished.
Once I was home I remembered that I needed to make some amigurumi for an upcoming niece and nephew. The bunny is for the niece and she actually came six weeks early. I wanted to give it to my brother and sister-in-law at the baby shower but I got caught making it and my four year-old niece gave me up. And the monster worked out really well because we found out my sister was having a boy while me being back. Both of these seemed to go over really well.
Then these last things were done just for fun. The sign is actually some wood that Granni left behind and I decided to go ahead and paint "Welcome Foolish Mortals" on it. This references my favorite Disney Park ride: The Haunted Mansion. Originally it was just going to paint everything all flat, but Amber gave me the idea to modge podge the wallpaper on the back. I'm so glad that I did. I love how it turned out. It should be great to use at Halloween time.
Then this is another thing that Granni started but I finished. She made all the squares but one. I had to make one in order to get the pattern to work out. Which is ironic because there's also a square on the back because it's smaller than the others. I like how it turned out. This will be good to put on a table or on the back of a chair. We'll see in the future.
Wednesday, March 19, 2014
Purple Felt Dragon
I made this little guy a while ago. It was an interesting adventure. My last full on felt plushie was Frank and he had considerably fewer pieces. Like Frank, this plush was made by a pattern that I created while making him. I was a little frustrated by how the head looked at first but I like it now. It gives him that squishy, plush feeling. He is also all hand sewn, no machine here. Some of the pieces that I had to make would have been a struggle with a machine. I also like how his wings turned out and the fact that they need nothing to stay up like they are. Oh, you can kind of tell that the black felt is sparkly but it really is. It's a fun felt.
He's around 6" tall, 5" wide. Made of felt, polyfil, thread, and safety eyes.
Wednesday, October 16, 2013
Two Bone-tastic Plushes
Those who know me know that I like creepy cute. I like the juxtaposition of the two ideas that seem like they shouldn't work together. I liked the idea to bring it to Halloween in decorations, once again. The last time I made a creepy, cute Halloween plush was Frank. I still love the little guy. But this time I decided to go with a bone theme.
I drew a couple of different designs for a skeleton before deciding on this one. I thought that this short design with a large head helped keep the cute along with the creepy. The heart was a last decision when I was cutting out the felt pieces. I felt like it needed some color since the front and back were only black and white. (The back is a black and white dotted fabric.) While watching General Conference I hand-sewed on the bones and heart. Then I used a sewing machine for the rest.
I also decided to make a sugar skull. These are little confections that are seen during Dia de los Muertos. I have always liked their aesthetic. The vibrant colors with dark lines was a cool contrast to me. When I first drew this out I thought I was going to embroider a black line for the teeth. But after rummaging through my embroidery thread I saw that I didn't have enough black for that. So I decided to cut out a whole for the teeth and then use that scrap to make the teeth. Something strange went on when I put them on. There wasn't supposed to be a big gap between the rows of teeth, but somehow it happened. I still like the overall look of the skull, though.
| Close-up shot of some of the details. |
Friday, July 26, 2013
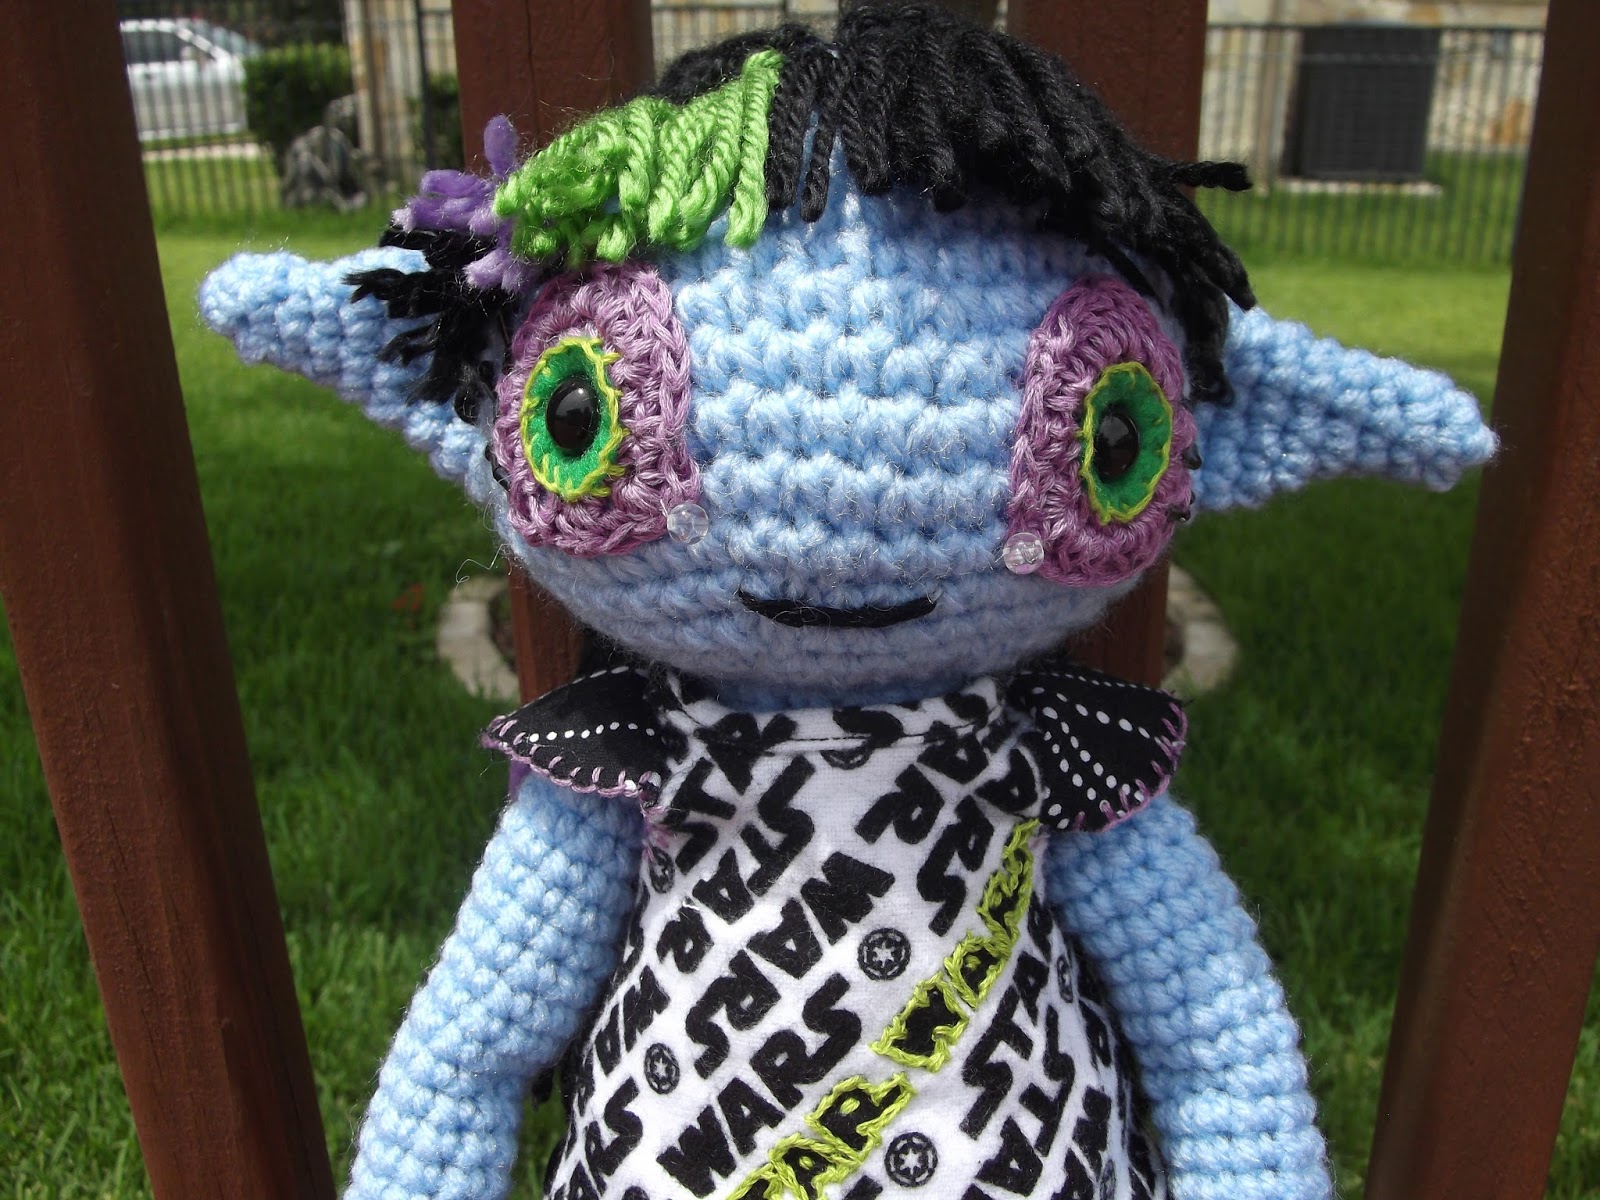
Lulu the Dark Elf
I recently got a hold of Amigurumi! Super Happy Crochet Cute by Elisabeth A. Doherty at Half-Priced Books. I have been wanting to make something from that book for years now but this is the only time I could have gotten the book for under $8. I didn't want to follow one of the patterns to the "T," though. I decided that this would be a good time for making a Dark Elf like I have for some time.
This girl took some time to make. My wrists and knuckles have been giving me some grief more than I had anticipated. I had to take more breaks than I liked. The hair took longer than I thought it would, as well. I hadn't done a french braid for an amigurumi before and it took a little more thought. It was also nice to sew some clothes for her. Everything can come off of her but the shirt. I had to sew it shut although I could have added snaps. I really like how she came out. Now it's time for close-up shots.
Thursday, May 9, 2013
Ewok Amigurumi
It's my nephew's birthday tomorrow and I was trying to come up with something that I could make for him. My first thought was making him R2-D2, but I realized that I didn't have any gray yarn. Then Yoda came to mind but I wasn't sold. Then for some reason the Ewok from Return of the Jedi stuck in my mind. And thanks to my Crochet Link Blanket I had the right colors of yarn for him. I think the ewoks are hilarious and I'm pretty sure he might think so as well. I mean, he's only turning 5. Things that are silly are funny at 5. I think the next time that I make an ewok I will elongate the body by four rounds. The proportions are a tiny bit off to me right now. Either way, my nephew won't care. ;)
Friday, May 3, 2013
An Oldie and Some New
First, I'll start with an older craft. This is an amigurumi that I made for my newest nephew. I made this back in February but with the move and all this was the only good picture that I got of it. I'm not sure why I decided on a wolf. All I remember is that I like the color combination and the sparkles in the green yarn. I figured it would make a good plush for him.
Here are some polymer clay rings and a charm. I just finished glazing these yesterday. I've always wanted to make some polymer rings but I didn't have the right ring backs. I eventually found them at a Hobby Lobby in WA and now had a chance to do something with them here in TX. These are the designs that I thought would be fun. And the little charm will be fun to wear on a necklace or something. I thought that Paperman was a cutest short when I first saw it. I figured it would be an awesome charm.
And finally, here is another Mon-Mon. This time he's blue/pink and love brains just as much as the other Mon-Mons. Although this time it seems he may have gotten a little hungry before he could be photographed.
Monday, November 21, 2011
Some Art
I've recently been making a ton of things for the events that I've participated in. It's about time that I've shared some of what I've done.
I made some new Halloween charms. I done some Halloween charms before, but it was back in 2007. Some of them needed a revamp and I wanted to makes some new ones as well. I actually made four of each of the small charms and some sold better than others, but that's what happens. ;)
I also crocheted some more things. I made a couple of beanies and some flower headbands. Each headband has two chains that they're attached to and close with a button behind the head. They're super easy and simple to add something to your hair.
This kanzashi I made for the Gala. I needed something that would work well with my outfit and that wasn't cheap looking. Thankfully I had what I needed to make this. I like how it turned out. It's meant to be worn with the beads and petals going straight down the side.
My Aunt Annette is having a baby any time now. I decided that I wanted to give the baby her first plushie. I decided to go with a pattern that I knew that I liked. This is the amineko pattern that I did before. This time I extended the legs and tail by 6 rounds and the ears by 1 round. I like the proportions a lot more, and crocheting through both rounds makes it look a lot nicer. I realize that this one will be almost as tall as the baby when she's born so she won't play with it for a long time; but some day she will. xD
Tuesday, December 28, 2010
Christmas Presents
Now that Christmas has come and gone, I can now post pictures of the items I made as gifts. I'm pretty happy with how they turned out. I'm also glad that they liked them so much! It was also an interesting experience since I had to make two gifts of the gifts completely before leaving for break. The other one I had to have the body ready to finish when I got home. Boy, did my fingers hurt.
This gift was for my Mother. She mentioned something to me some day that she would like crocheted chilies. I guess she forgot because she was completely surprised. It now hangs on the shelves in the living room.
To be honest, I've always wanted to make something KC Chiefs related for my Dad. I was always worried though because they weren't doing so hot in the past. I figured he would say something like, 'Oh, this is cool. Too bad they suck.' I'm glad they're doing well. A part of me wishes that I had the time to do in single crochet stitches instead of double. Oh well. He still liked it.
My siblings and I would love to watch Teenage Mutant Ninja Turtles together when we were younger. We even had one of them as a 'pseudo name' since there was four of us and them. Zak was Raphael; and he has continued to be his favorite of the four since. I really like how he turned out. I may have to make the other three. ;)
I was also able to get them some little things from the BYU Bookstore. They seemed to really like them. ^^
This gift was for my Mother. She mentioned something to me some day that she would like crocheted chilies. I guess she forgot because she was completely surprised. It now hangs on the shelves in the living room.
To be honest, I've always wanted to make something KC Chiefs related for my Dad. I was always worried though because they weren't doing so hot in the past. I figured he would say something like, 'Oh, this is cool. Too bad they suck.' I'm glad they're doing well. A part of me wishes that I had the time to do in single crochet stitches instead of double. Oh well. He still liked it.
My siblings and I would love to watch Teenage Mutant Ninja Turtles together when we were younger. We even had one of them as a 'pseudo name' since there was four of us and them. Zak was Raphael; and he has continued to be his favorite of the four since. I really like how he turned out. I may have to make the other three. ;)I was also able to get them some little things from the BYU Bookstore. They seemed to really like them. ^^
Thursday, October 28, 2010
Craft Dump
I've been so far behind on posting on the blog about my recent craftiness. This post will probably be HUGE. I'm sorry! D=

This is Frank. I wanted to make a plushie completely out of felt that was Halloween themed, and since I love Frankenstein by Mary Shelley I thought I would make him. I know he's not true to the monster in the book but I guess I took some creative liberties by making him how I wanted him to look.


These next two were gifts for an aunt. Her costume is Steampunk but she doesn't have any accessories that she could wear with it. I decided to make the bracelet first. I wanted to use kanzashi to make something feminine with edgy side. I like the contrast between soft and hard in the materials to the shapes. The wire wrapping and chain making was interesting since I didn't have any pliers. Needless to say my fingers were raw after making it. >.< The ring came after the bracelet. While making the gears for the flowers I had an extra. (All made out of Cold Porcelain clay. Clay I made from scratch!) Then it was painted and had wire hot glued to the back for it to be adjustable.

I held a contest on my deviantART page. The winner had to get an image of my 7,000 page view (along with other information) and then note it to me. The winner actually didn't know what she wanted so I had to nudge her in a direction. At first I mentioned Halloween theme and then she said that was good or something like a panda. So, I made a panda using purple and white instead of the normal color combo. It's about 3.5" tall. It's on its way to Tunisia right now! I hope it makes it safely. *crosses fingers*

While I was making the panda, I made these pumpkin earrings. I thought they would be a nice touch to wear on Halloween and during the Fall season. I almost put Jack-O-Lattern faces on them but I wouldn't wear them any time but Halloween then. I'm actually wearing them right now and they're super light and easy to wear. =)


This was actually made a long time ago. It's a Rabbid from the Raving Rabbid series by Ubisoft. I love these guys. They make me laugh so much. xD I made him in mind of my other felt key chains so they could be put together.
And finally I made this yesterday. This is a Weighted Companion Cube from the game Portal. I love watching the boys play the game and wish I could do it myself. I've been scared to because I know it will be frustrating. Perhaps some day I will try. This also was made to match my other felt key chains so they could be put together on the same key ring.
Saturday, August 21, 2010
BYU Cougar Amigurumi
I had this idea to make a new amigurumi. I was testing out some shaping to amigurumi while making him. You can't really tell from these pictures but his arms and legs curve. I finally figured out how to make that work. ^^ I wanted to also add lots of details like the footpads and beads. I hope you can see them all. I would imagine taking him to football games. ;D I do wonder if he really looks like a cougar though. My dad kept making fun of him by saying he looked kind of like a deer. D= Oh well. I also made his sweater removable but I doubt he will have it off that often. ;)
Wednesday, August 4, 2010
Amigurumi & Cosplay Status
This is another amigurumi to be sold in my future Etsy shop. I like the contrast in yarns and thought it would be perfect for a cute little bear! The picture is horrendous so I'll make sure to have a better picture up for Etsy. I'll let you all know when that happens. I just want to make a few more things before setting it up. ;)
Some of you may know that I'm working on a new cosplay. This one will be Vincent Valentine from Final Fantasy VII. For him I had to make some faux metal. I used a tutorial posted here. I actually changed it up a a bit. I made the pieces the same way but then I only did a layer of Elmer's glue, no water. Then I have five layers of gold acrylic paint. Attaching the pieces to the boot covers and glove that I made turned out to be harder. I had to end up using super glue and it worked really well. I'm pretty happy with the results being my first time doing this method. What you do think?
Sunday, July 11, 2010
A Doll & Amigurumi
It's been way busy since I lasted posted. I have to write about two movies that I've seen as well as this one. There are a ton of people over and that just makes everything crazy. I probably should be drawing in my sketchbook instead of doing this but I've let it go far enough.
First, I finally finished making Coraline's doll. I started making this last Christmas vacation it wasn't until recently that I got the blue yarn to finish her. She's not entirely perfect but I'm okay with that. If I ever make any more in the future then I know what changes to make to the pattern I created.

Second, I started making some more amigurumi that I could possibly sell soon. (That is when the sketchbook is done. No more making things until then.) I decided to make some small animals wearing a hooded vest. I like how they turn out. I think more animals will have to be made in the future. ;)

Finally, I've wanted to make one for a while but I got around to him. This is Totoro from Hayao Miyazaki's My Neighbor Totoro. I think it's a really cute show. He's not he most perfect amigurumi ever. I like the base but the face needs some work. A little smaller will be better for possible future ones.
First, I finally finished making Coraline's doll. I started making this last Christmas vacation it wasn't until recently that I got the blue yarn to finish her. She's not entirely perfect but I'm okay with that. If I ever make any more in the future then I know what changes to make to the pattern I created.

Second, I started making some more amigurumi that I could possibly sell soon. (That is when the sketchbook is done. No more making things until then.) I decided to make some small animals wearing a hooded vest. I like how they turn out. I think more animals will have to be made in the future. ;)
Finally, I've wanted to make one for a while but I got around to him. This is Totoro from Hayao Miyazaki's My Neighbor Totoro. I think it's a really cute show. He's not he most perfect amigurumi ever. I like the base but the face needs some work. A little smaller will be better for possible future ones.
Subscribe to:
Posts (Atom)