Showing posts with label Crochet. Show all posts

Friday, September 26, 2014

Amigurumi Serenity Pattern


My sister requested this for her unborn son. She and her husband like Firefly by Joss Whedon. She thought that it would be cool to let him have a crocheted Serenity. And I thought, why not let others be able to make one of their own. I don't know the exact measurements but it is under 12".

**Please don't make these to sell them. Also let others know where you got the pattern from. Thanks!

Serenity Spaceship Pattern

G Hook (4.25 mm)

MAR = Magic Adjustable Ring
ch = chain
sc = single crochet
st =stitch
sl st = slip stitch
sk st = skip stitch
inv dec = invisible decrease
inc = increase
*(...)* = repeat between * around
Rd = Round

*All worked in both loops.

Body:
MAR
Rd 1: 6 sc into MAR (6)
Rd 2: inc around (12)
Rd 3: sc around (12)
Rd 4: *sc, inc* (18)
Rd 5-6: sc around (18)
Rd 7: *sc 2 st, inc* (24)
Rd 8-9: sc around (24)
Rd 10: *sc 3 st, inc* (30)
Rd 11-13: sc around (30)
Rd 14: *sc 3 st, inv dec* (24)
Rd 15: sc around (24)
Rd 16: *sc 2 st, inv dec* (18)
Rd 17-18: sc around (18)
Rd 19: *sc 2 st, inc* (24)
Rd 20: *sc 3 st, inc* (30)
Rd 21-28: sc around (30)
Rd 29: *sc 3 st, inv dec* (24)
Rd 30: *sc 2 st, inv dec* (18)
Rd 31: sc around (18)
Rd 32: sc 9 st, sl st 9 st (18)
Rd 33-37: sc around (18)
Rd 38: *sc, inv dec* (12)
Rd 39-41: sc around (12)
Rd 42: sc st, inv dec 2 st, sc 4 st, inc 2 st, sc 3 st (16)
Rd 43: sc 2 st, inc 2 st, sl st 6 st, inc 2 st, sc 4 st (20)
Rd 44-46: sc around (20)
Rd 47: sc 4 st, inv dec, sc 7 st, inv dec, sc 5 st (18)
Rd 48: sc around (18)
Rd 49: sc 2 st, inv dec, sc 7 st, inv dec, sc 4 st (16)
Rd 50: sc 2 st, inv dec, sc 5 st, inv dec, sc 4 st (14)
Rd 51: sc 2 st, inv dec, sc 4 st, inv dec, sc 4 st (12)
Rd 52: inv dec around (6) END

Turbines:
*Make 2
MAR
Rd 1: 6 sc into MAR (6)
Rd 2: inc around (12)
Rd 3-11: sc around (12)
Rd 12: inv dec around (6) END

Wings:
*Make 2. Have a long tail before starting ch.
Rd 1: ch 14, sl st to 1st ch (14)
Rd 2-5: sc around (14)
Rd 6: *sc 5 st, inv dec* (12)
Rd 7-9: sc around (12) END *Don't close and leave a long tail. This end is sown to turbine.

APU:
*This is the small piece on the top of the back.
Row 1: ch 7, turn (7)
Row 2-5: sc 6 st, ch, turn (6)
Row 6: sk st, sc 4 st, ch, turn (4)
Row 7: sc 4 st, ch, turn (r) END *Leave long tail to sew. Fold in half and sew the piece on until about a third left. Fold in the two corners to middle and sew closed.

Wrap Around Piece:
MAR
Rd 1: 6 sc into MAR (6)
Rd 2-46: sc around (6) END *Leave long tail to sew.

Then use a yarn darner and black yarn to embroider as many details as you want. After this, you're done! Congrats! Now go aim to misbehave. ;)

Thursday, September 25, 2014

Star Afghan


I needed another thing to do with my hands while waiting for news from Salt Lake City to tell me when I can go to Hong Kong. I've had this one on my "To Do" list for a while. I found this patterna while ago and kept it tucked away. It wasn't until I was making a completely different afghan that I realized that this would be perfect. So I undid that and started this pattern. The pattern for this can be found here for free. 

I was so excited to finally do this. This is my favorite shape and I was able to use my favorite colors in it. It was fun to make but I do wish I knew why the corners are all wobbly looking. I'm not sure why it got that way. I stopped at this size because that was all the black yarn that I had. I may in some future make it bigger. I haven't decided yet. So right now it's a tentative work in progress.

Tuesday, September 9, 2014

Amigurumi Toothless


This was a fun pattern, and a little tricky. I wanted to crochet something but I wasn't in the mood of doing my own pattern for some reason. I was sniffing around Ravelry and seeing what I could make. Then I remembered that I had found one a while ago that I thought was pretty cool: Toothless. The pattern can be found here for free by Nicole's Nerdy Knots. 

I may have only done this one in a day... and my thumb is paying for it. He doesn't look that big in the pictures but his wingspan is over 2 ft. There are also a lot of small rounds to make up things like his tail and the spikes. It hurt but you get used to it. I did change the pattern on the wings slightly. I thought that it would look more accurate to the movie, and I would have to do fewer stitches. Score on both counts! I like how it turned out.


Saturday, September 6, 2014

Recent Art

So I've been trying to keep myself busy while being at home. I decided to do some art. It helps keep me distracted, mostly. While I was with my parents at my Grandad's house, I found some artwork that Granni started before she died. I was able to finish the first two pictured there because there was still some paint and brushes at his house. And no one seemed to mind. I think others may have been excited to see them finished.


Once I was home I remembered that I needed to make some amigurumi for an upcoming niece and nephew. The bunny is for the niece and she actually came six weeks early. I wanted to give it to my brother and sister-in-law at the baby shower but I got caught making it and my four year-old niece gave me up. And the monster worked out really well because we found out my sister was having a boy while me being back. Both of these seemed to go over really well.


Then these last things were done just for fun. The sign is actually some wood that Granni left behind and I decided to go ahead and paint "Welcome Foolish Mortals" on it. This references my favorite Disney Park ride: The Haunted Mansion. Originally it was just going to paint everything all flat, but Amber gave me the idea to modge podge the wallpaper on the back. I'm so glad that I did. I love how it turned out. It should be great to use at Halloween time.


Then this is another thing that Granni started but I finished. She made all the squares but one. I had to make one in order to get the pattern to work out. Which is ironic because there's also a square on the back because it's smaller than the others. I like how it turned out. This will be good to put on a table or on the back of a chair. We'll see in the future.

Thursday, August 22, 2013

White Crochet Purse


I usually use a black purse that I sewed when I was still in Washington. It's been a nice size and works fairly well, but I've been wanting one about the same size in white. I didn't want to sew it this time. I wanted to make something that had a lot of texture, and I figured that crochet would get the effect that I wanted.

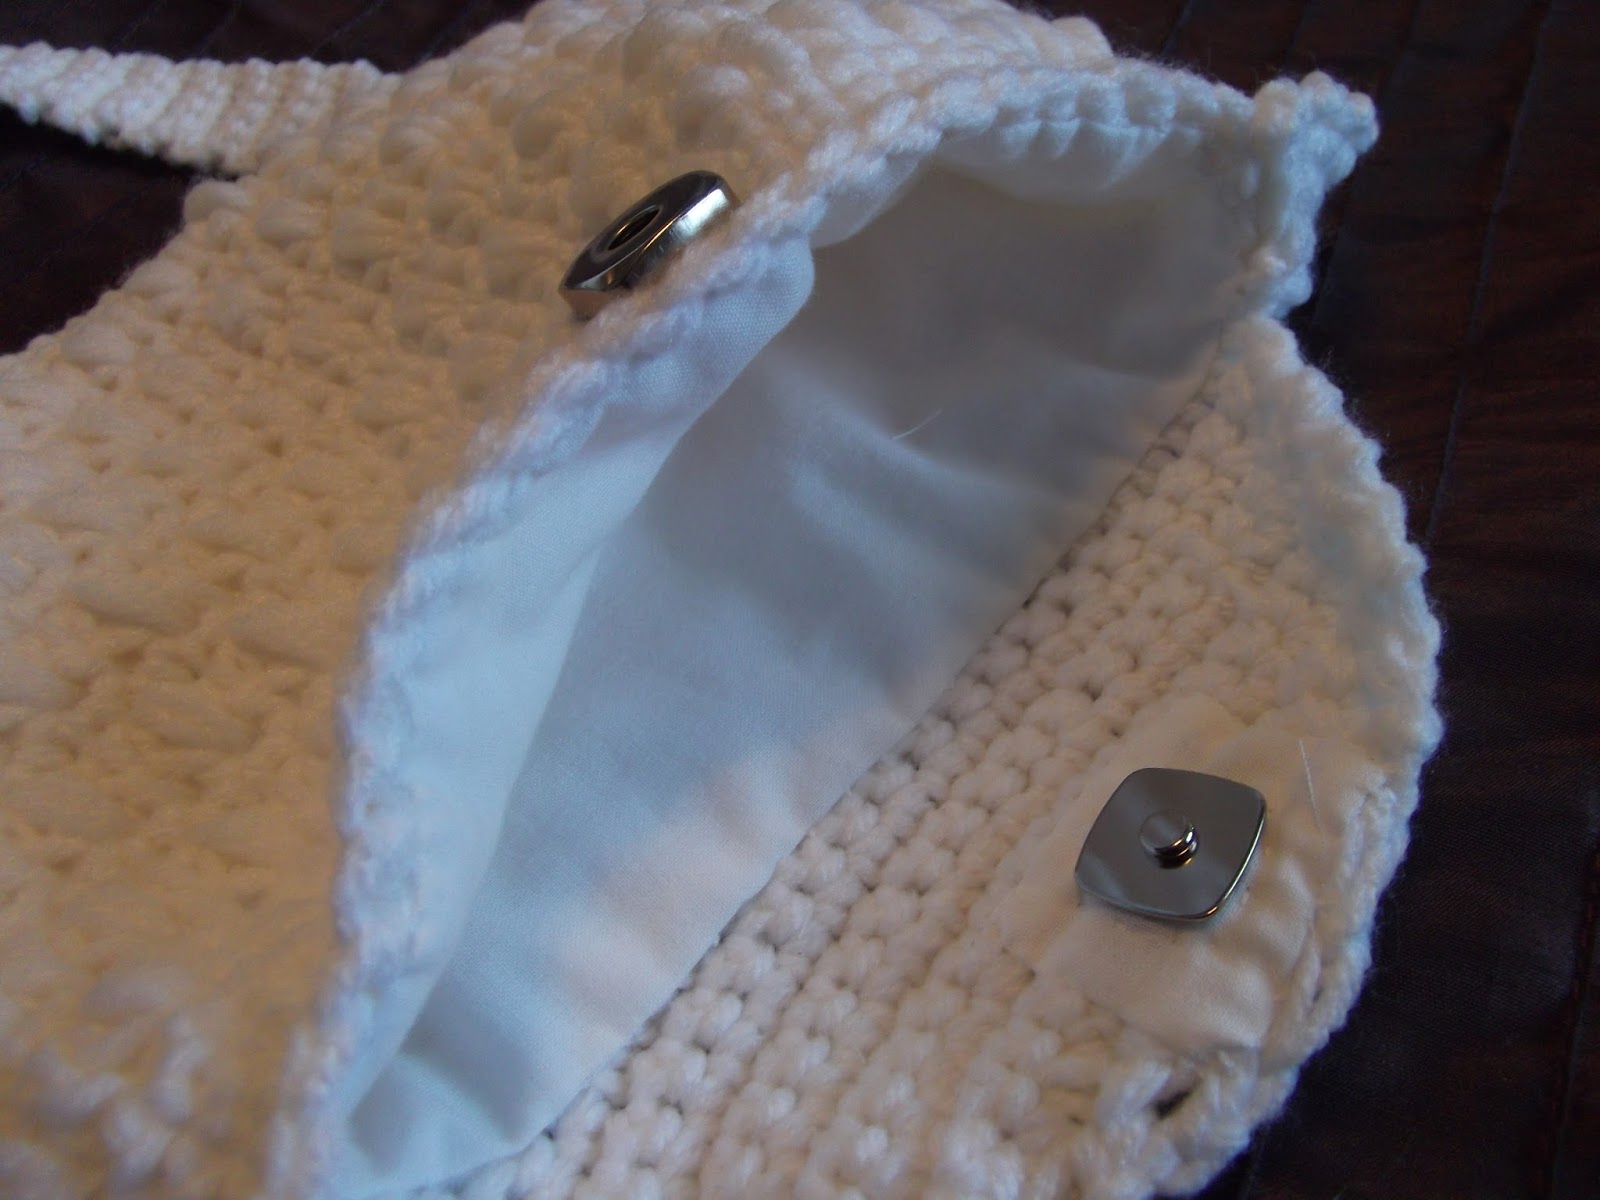
For this purse I used single crochet, double crochet, puff stitch, chain, and slip stitch to make it. I had used this same pattern for a couple of scarves and decided that it would work pretty well. This purse is worked with a long chain base and then in the round. After completing it I realized that it needed a fabric lining and I planned on using some magnetic clasps to keep it closed. I ended up sewing all of the fabric by had because I didn't want to pull the sewing machine out for something small. It seemed silly to me. So I used a running stitch around and then slip stitch to attach the lining. I also used a slip stitch to adhere the fabric holding the magnetic half on the flap. It think it worked pretty well.

The lining and magnetic clasps.

Friday, July 26, 2013

Lulu the Dark Elf


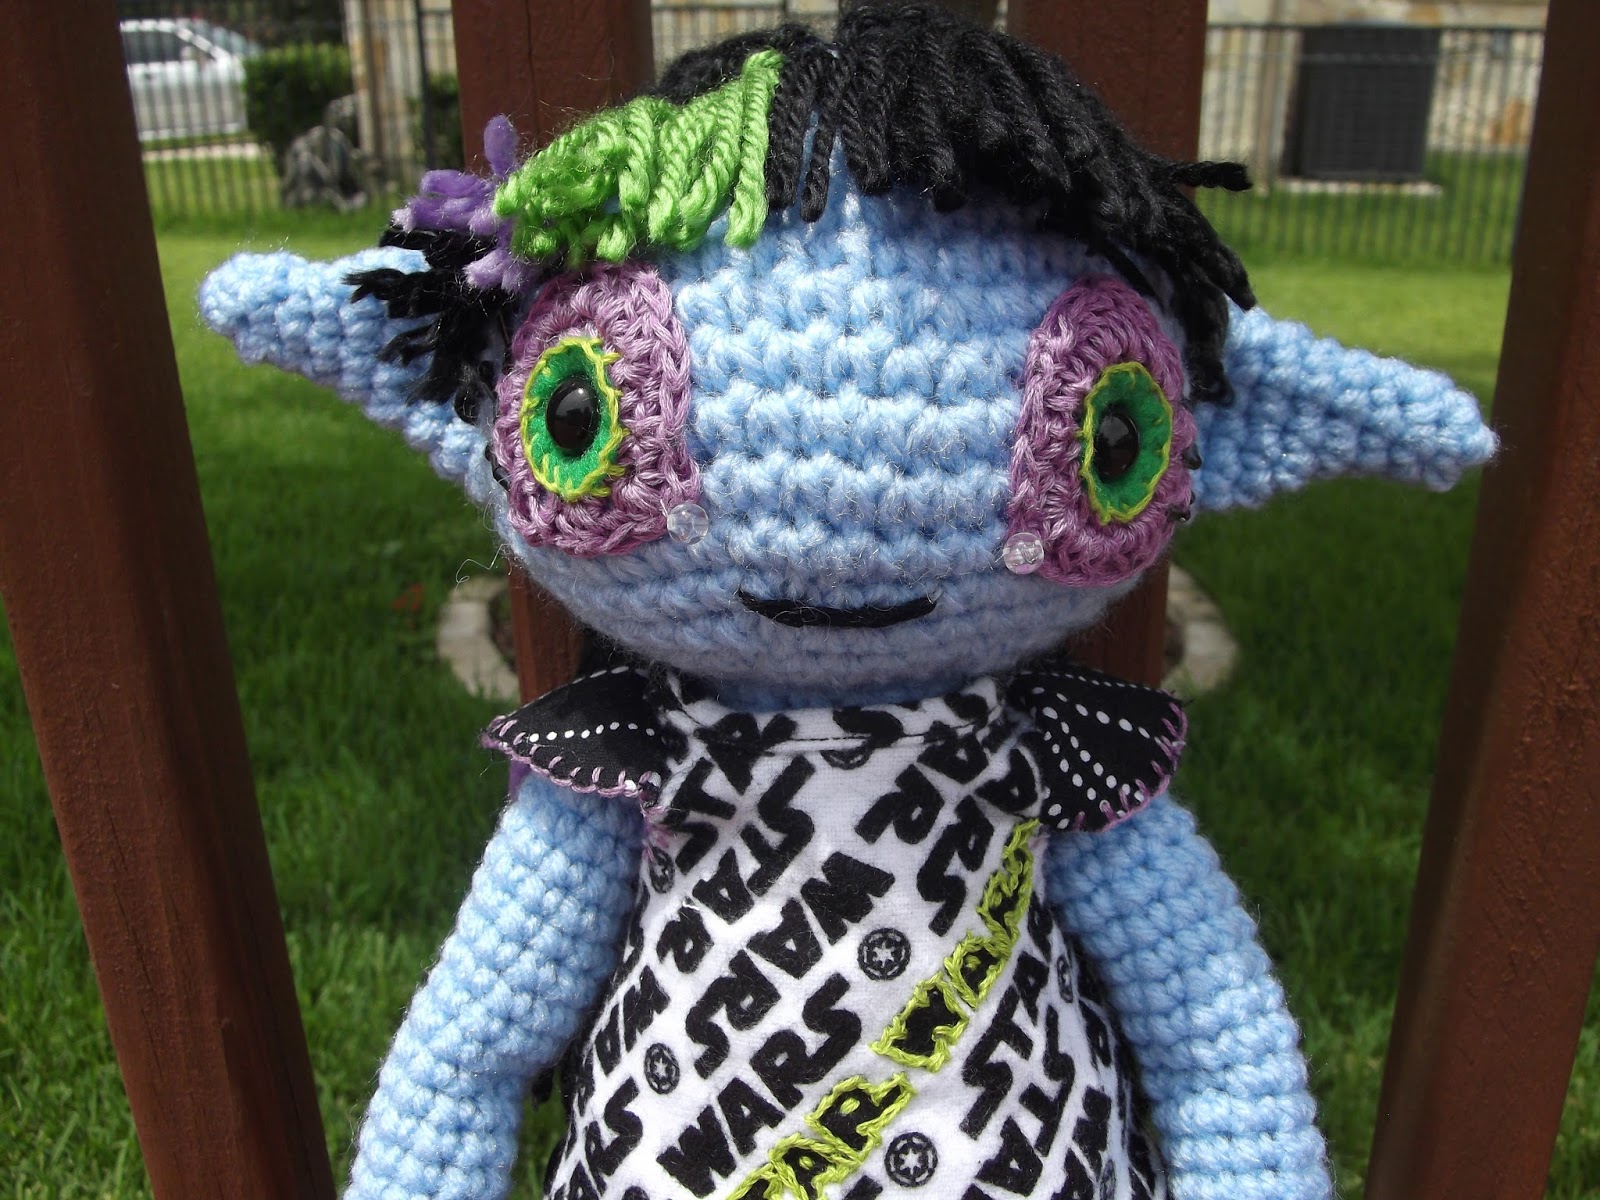
I recently got a hold of Amigurumi! Super Happy Crochet Cute by Elisabeth A. Doherty at Half-Priced Books. I have been wanting to make something from that book for years now but this is the only time I could have gotten the book for under $8. I didn't want to follow one of the patterns to the "T," though. I decided that this would be a good time for making a Dark Elf like I have for some time.

This girl took some time to make. My wrists and knuckles have been giving me some grief more than I had anticipated. I had to take more breaks than I liked. The hair took longer than I thought it would, as well. I hadn't done a french braid for an amigurumi before and it took a little more thought. It was also nice to sew some clothes for her. Everything can come off of her but the shirt. I had to sew it shut although I could have added snaps. I really like how she came out. Now it's time for close-up shots.


Thursday, May 9, 2013

Ewok Amigurumi


It's my nephew's birthday tomorrow and I was trying to come up with something that I could make for him. My first thought was making him R2-D2, but I realized that I didn't have any gray yarn. Then Yoda came to mind but I wasn't sold. Then for some reason the Ewok from Return of the Jedi stuck in my mind. And thanks to my Crochet Link Blanket I had the right colors of yarn for him. I think the ewoks are hilarious and I'm pretty sure he might think so as well. I mean, he's only turning 5. Things that are silly are funny at 5. I think the next time that I make an ewok I will elongate the body by four rounds. The proportions are a tiny bit off to me right now. Either way, my nephew won't care. ;)

Monday, April 29, 2013

Crochet Link Blanket


It's done! My first crochet blanket. Ever since I started crocheting almost 10 years ago, I've wanted to make a blanket. I wasn't sure if my patience would wear out, though. So I didn't think about making one seriously until a little while ago. Moving across country had me missing my crochet hooks and I was itching to make something new. Then General Conference came around and it was a perfect time to start this. I like to give my hands something to do so I pay more attention. I hadn't decided to make Link until I looked at my perler creations. I had to choose one that wouldn't turn out too small or too big. This seemed the right fit.

This Link comes from "A Link to the Past." He is comprised of 286 granny squares and 13 colors. The black was the most with 131 squares and over two pounds of Caron yarn. He is slightly over 4.5' by 6.5'. I had no idea that he would end up being so large. I mean, I should have known when I made that first square, but it didn't hit me until I made the light blue ones.

If you want to make one of your own, here is the master list of colors and their amount of squares:
  • Black - 131
  • Dark Green - 27
  • White - 26
  • Dark Skin - 21
  • Light Skin - 17
  • Pink - 16
  • Light Green - 13
  • Dark Blue - 12
  • Orange - 7
  • Light Blue - 6
  • Yellow - 5
  • Brown - 3
  • Red - 2
If something like this seems to be a daunting task, don't worry. You don't have to do it in 20 days like me. I'm just weird and like to get things done as fast as I can. (And if I didn't have tenosynovitis it would have been done sooner.) Take your time. It's totally worth it in the end. I'm so happy with how it turned out, and I hope that it'll be used for years and years to come.

Tuesday, April 23, 2013

Crochet Mickey Mouse Bag Pattern


Mickey Mouse Bag:

You'll need:
  • G-6 Crochet Hook (4 mm)
  • Black Yarn
  • Yarn Darner/Needle
  • OPTIONAL: Whatever you want the strap to be made of.

Ears: Make Four
  1. Magic Adjustable Ring OR ch4, ss to beginning of chs, ch3
  2. 12 dc into ring, ss to top of ch3 (12sts)
  3. inc in every st around, ss, ch3 (24)
  4. *dc into next st, inc in next st* Repeat around, ss, ch3 (32)
  5. *dc into next 2 sts, inc in next st* Repeat around, ss (44) END
Head: Make Two
  1. Magic Adjustable Ring OR ch4, ss to beginning of chs, ch3
  2. 12 dc into ring, ss to top of ch3 (12sts)
  3. inc in every st around, ss, ch3 (24)
  4. *dc into next st, inc in next st* Repeat around, ss, ch3 (32)
  5. *dc into next 2 sts, inc in next st* Repeat around, ss, ch3 (44)
  6. *dc into next 3 sts, inc in next st* Repeat around, ss, ch3 (56)
  7. *dc into next 4 sts, inc in next st* Repeat around, ss, ch3 (68)
  8. *dc into next 5 sts, inc in next st* Repeat around, ss, ch3 (80)
  9. *dc into next 6 sts, inc in next st* Repeat around, ss (92) END
Put It Together:
Now you will use your yarn darner/needle to sew the pieces together. Make sure the "right way" is facing each other before you start. Sew the ears and then the head. Then you will sew the ears to the head. Now it's up to you to decide what kid of strap you want. This one is a bunch of yarn braided. Easy but very stretchy, so be careful. OPTIONAL: If you want a button flap then you should crochet back and forth on one side of the head that it open. Make sure to leave a button hole. Sorry I don't have the pattern for this part. I forgot to write it down when I made it over a year ago.

**If you make one, please let me know! I would love to see it. And please give credit where it's due.